
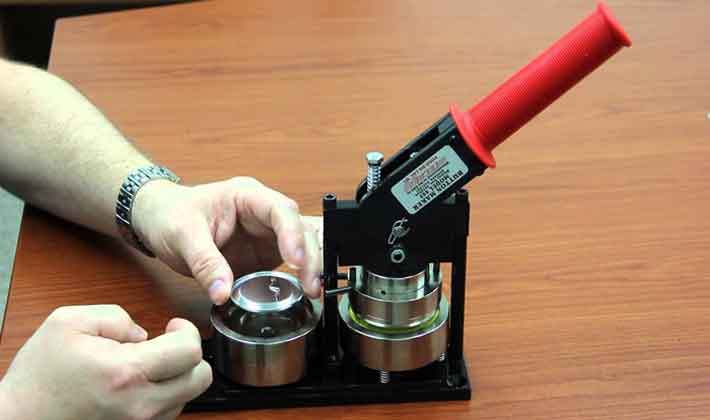
If you are looking for a button maker, you’re in luck! Many American brands have many different styles and functions. These models can produce all kinds of button designs, including those with multiple colors and a rotary cutter. If you want to have some fun and be creative with your button design, you can check out Tecre’s Button Blog. This website has tons of cool ideas and can help you find the perfect button for your design.
Problems with American Button Machines
There are several common problems associated with American button machines. The machine may jam when there is too much paper or when the pick up die gets stuck inside the upper die. These problems can be avoided by following the step-by-step instructions and not damaging the metal components. However, there are some instances where a repair may not be possible. In these cases, you may need to contact an experienced button maker. However, if you are not sure how to repair the machine, follow these tips.
To troubleshoot a machine, make sure you use the correct tools. Before attempting to disassemble the machine, you should gather a few items. A 7/16″ wrench, a lubricant, and paper towels are recommended. Make sure to spray the silicone spray at the locations marked with arrows. Be sure not to spray the machine’s interior, as the silicone spray can end up on the button designs.
Using a laser printer
Using a laser printer to use he button maker is not difficult. First, you will need to select the correct print resolution for your button maker. The printer resolution can range from 600 x 600 dpi to as high as 9600 x 2400 dpi. The higher the resolution, the better the printing quality. For text-based buttons, you may want to use a 600 x 600 dpi printer, while for cartoons and photo-style buttons, you should select a higher resolution printer.
Laser printers offer high resolution. However, you should be careful when selecting the paper you are going to use. If you use “Graphics” or “Presentation” paper, it will not spread the ink as well as photo-quality paper. Many button makers won’t work with these types of papers. Laser printers are the fastest option, but they require more maintenance than inkjet printers.
Using a rotary cutter
If you are new to making buttons, you can use a rotary cutter to cut a variety of shapes and sizes. One example of this is a 1 inch button maker. In order to make this size, you will need a circle cutter that is 1 inch in diameter, and a graphic punch that cuts at 1.313″. Getting the circles cut accurately and quickly is crucial to making high-quality buttons. There are several different types of cutters, including graphic punches, die cutters, and wheel cutters.
While many people may not think of using a rotary cutter with a button-maker, they should. It is an excellent tool for cutting fabric, and the blade is a rotary type. It is easy to cut many layers of fabric with it, and its ergonomic handle makes it comfortable to hold. However, using a rotary cutter is not a substitute for scissors. If you use this tool properly, it will make your button-making experience a lot more enjoyable and successful.
Using a CD
Using a CD as a B button maker is one way to save money and still get the same high-quality buttons. You can download graphic templates from the CD to get started creating your own buttons. Then, you can print the graphics yourself using your own paper or graphic design software. While you can purchase button making software online, a CD is not a substitute for a software license.
Firstly, you will need a button die. The die you are using for the button should have a small diameter. Generally, a one-inch button will need a magnet or pin. Secondly, you will need a sheet of standard printer paper for the button material. It is best to use one sheet of paper at a time, because you may be tempted to use multiple sheets. You can also print a button template to make sure you are using the correct size.